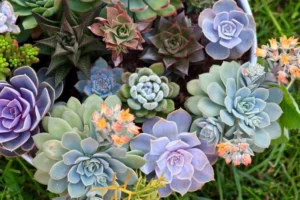


Succulents are sturdy, resilient plants known for their water-storing capabilities and aesthetic charm. But even the hardiest of these plants need some TLC from time to time. One crucial aspect of succulent care involves knowing how to properly repot a succulent. Repotting succulents not only gives them room to grow but also refreshes the nutrients in their soil, ensuring they thrive in their new homes. We’ll walk you through the process step-by-step, ensuring your succulents get the best possible start in their new pots.
Table of contents
Why Repotting a Succulent is Essential

Repotting succulents is a critical aspect of their care. Over time, a succulent’s roots may outgrow its pot, leading to a condition called being ‘pot-bound’. This lack of space hampers the plant’s growth and can lead to nutrient deficiencies. Repotting succulents into a larger pot with fresh soil can rejuvenate them, providing the space and nutrients they need to flourish.
When to Repot a Succulent
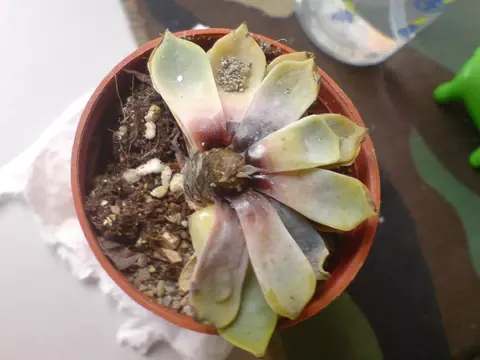
Knowing when to repot a succulent is just as important as knowing how. Typically, succulents should be repotted every two years. However, if you notice your plant showing signs of stress, like yellowing leaves, stunted growth, or roots protruding from the drainage hole, it might be time to give it a new home sooner.
Tools You’ll Need to Repot a Succulent
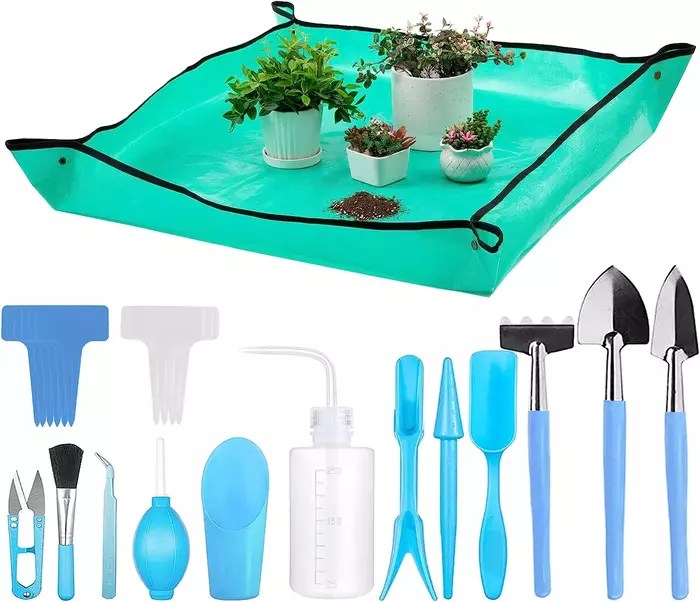
Before we dive into the step-by-step process, let’s gather the necessary tools. Here’s what you’ll need:
- A new pot: Make sure it’s a bit larger than the current one and has adequate drainage.
- Succulent soil: A well-draining soil mix is essential for succulents.
- Trowel or spoon: For scooping soil.
- Gloves: To protect your hands from the succulent’s spines.
- Optional: Top dressing (like pebbles or moss) to decorate and help retain moisture.
Step-by-Step Guide to Repotting a Succulent
Now that we’re prepared, let’s get into how to repot a succulent.
- Remove the Succulent: Start by gently removing the succulent from its current pot. If it’s stuck, tap the sides of the pot to loosen the soil and roots.
- Inspect and Prune the Roots: Check the roots for any signs of rot or pests. Healthy roots should be firm and white. Trim any damaged or excessively long roots with a clean, sharp pair of scissors.
- Prepare the New Pot: Add a layer of succulent soil to the bottom of the new pot. The depth of this layer should allow the plant to sit at the same level it was in its old pot.
- Plant the Succulent: Place the succulent in the new pot, spreading the roots out gently over the soil. Then, add more soil around the plant, pressing lightly to secure it in place. Ensure the succulent is not planted too deep – the soil level should be the same as it was in the previous pot.
- Add Top Dressing (Optional): Oncethe succulent is securely planted, you can add a layer of top dressing if you wish. This not only adds to the aesthetic appeal but also helps to retain moisture in the soil.
- Let it Rest: After repotting, give your succulent a few days to adjust before watering it. This allows any disturbed roots to heal and helps prevent root rot.
Aftercare: What to Do After Repotting a Succulent
Repotting can be a bit stressful for your succulent, but with proper care, it will soon adjust to its new environment or garden. Here’s what you should do after repotting a succulent:
- Wait Before Watering: Give your succulent a few days to adjust before you water it. This helps any damaged roots heal and avoids causing root rot.
- Provide Adequate Light: Make sure your succulent gets plenty of light, but avoid direct sunlight for a few days as it may cause sunburn while the plant is still adjusting.
- Monitor Your Plant: Keep an eye on your succulent for any signs of stress or disease. If you see anything concerning, it’s best to address it as soon as possible.
Common Mistakes to Avoid When Repotting a Succulent
Even with the best intentions, it’s easy to make mistakes when repotting succulents. Here are a few common pitfalls to avoid:
- Overwatering: Succulents don’t need a lot of water, and overwatering, especially right after repotting, can lead to root rot.
- Wrong Soil Type: Using a soil that doesn’t drain well can cause water to pool, leading to root rot. Always use a well-draining succulent or cactus mix.
- Too Big a Pot: While your succulent needs space to grow, a pot that’s too large can retain too much water. Choose a pot that’s just a bit larger than the current one.
I hope you found this guide on how to properly repot a succulent helpful. With these tips and steps, your succulents are sure to thrive in their new homes or gardens. Remember, succulents are hardy plants, and with a bit of care and attention, they can provide a touch of natural beauty to any space for years to come.